Canvas is the best drop cloth known for its durability and thickness. Soft goods like curtains can be made easily with this fabric. Drop cloth curtains are the timeless way to cover windows and add plenty of comfort as well as a farmhouse charm to your home. Because of the weight of the drop cloth, they hang gracefully, and their thickness helps them keep their shape.
Instead of purchasing new window treatments for homes, it’s much more affordable to create your curtains from scratch. To give your rooms a soft look and add coziness, you can easily make no-sew drop cloth curtains. We have prepared a step-by-step guide for beginners to understand each point of the project.
Step By Step Tutorial To Make Drop Cloth Curtains
Supplies You’ll Need
- Canvas Drop Cloth
- Scissors
- Measuring Tape
- Drapery Clips
- Iron
- Ruler (optional)
- Finials, Brackets, Rod
1. Measure & Plan
Accurate Measurements are of key importance when it comes to buying or making window curtains in dubai. You can plan for the look you want to give the room. Take proper measurements of the window’s length and width using measuring tape. The length of the drop cloth curtain can be personalized according to the window coverage requirements or your taste.
For width, you will need the fabric in an extended width of 6-8 inches from both sides. The general lengths and widths mentioned above can be customized. If you want to create the impression of a spacious area, go for floor length curtains. For a casual look, you can keep the length just below the window sill.
2. Wash and Iron Cloth
Preparing the drop cloth is the essential step to take for a tidy look. Take your canvas drop cloth and wash it on a gentle cycle with a mild detergent to give it a fresh and new feel. After washing, let the drop cloth dry completely.
Fabrics get wrinkles most of the time after washing. Use iron to get the wrinkles out of the fabric. Make sure to keep the heat setting low or medium.
3. Cut & Hem Drop Cloth To Size
Now that you have got the wrinkle-free fabric, it’s time to cut it to the size of your room windows according to the measurements. Commonly, curtains are 54” wide. You can double up them for making pleats or for a fuller look.
Depending on how tall your room ceiling is, the length of drop cloth curtains can be cut to size. But make sure to keep at least 8 inches of fabric for the bottom hems. To hem the sides, fold the fabric so that any raw edges are not exposed. Sew the fabric along the entire side and repeat the same process for the other side. The same goes for the bottom hem.
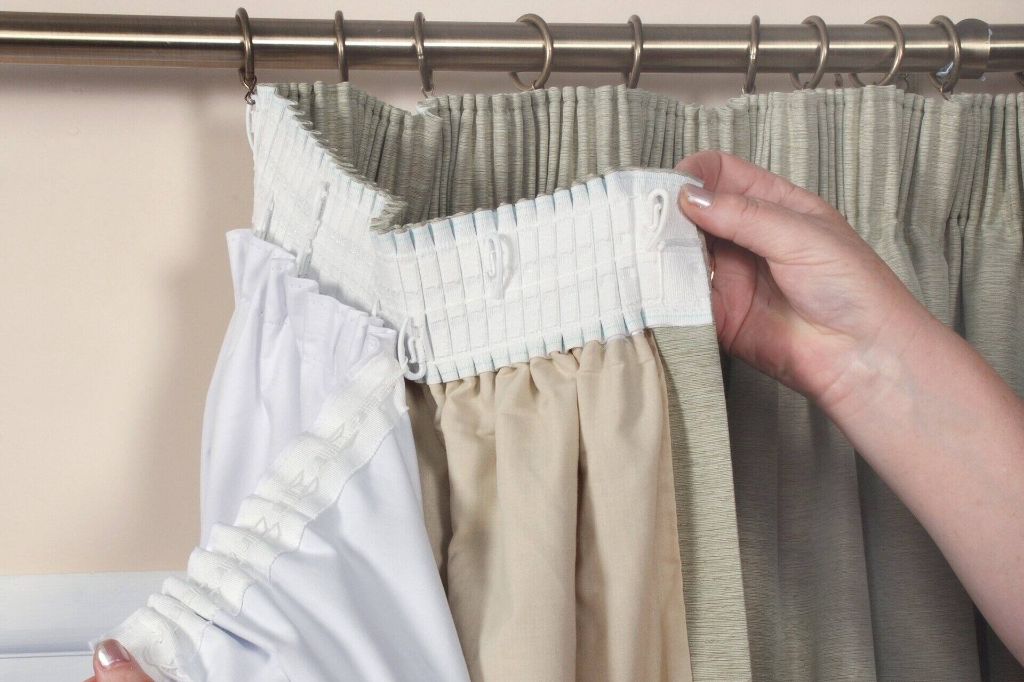
4. Attach Heading Tape
Fold down the top of your drop cloth a little wider than your heading tape. Now pin the header onto the fabric. The header length can be 4 inches. For a clean edge look, you can hem the heading tape before attaching it to the fabric. Then, sew the heading tape onto the drop cloth.
5. Attach Pleated Curtain Hooks or Clips
Attach the curtain hooks or clips on the header while leaving some gaps. If the header is pleated, leave an equal gap between the hooks. The approximate distance between each hook can be 8 to 10 inches.
5. Hang & Enjoy
Now the drop cloth fabric curtains are all set to be hung on the rod because you already took the measurements for windows. While hanging curtains, fold the fabric until it is ⅛ inches above the floor. Use curtain pins to hang the fabric.
At this point, you’ll be done with hanging your no-sew drop cloth curtains.
Final Note!
Making no-sew drop-cloth curtains can be a great idea to cover your windows. These curtains can be created in no time with the help of our easy DIY guide. All you have to do is find a drop cloth that is in good condition or you can shop for a new one as well. Measure and cut it to the size of the windows. Hem the drop cloth, make the header, and attach it to the rods with the help of curtain clips. Make sure to wash, iron, or steam the drop cloth before hanging.